Thanksgiving recipe guide
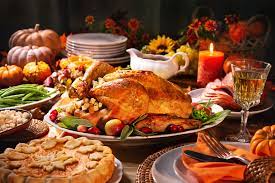
Thanksgiving, the most delicious holiday of the year… But what is Thanksgiving for those who do not know how to cook the miraculous delicacies of the kings and queens before us? Well, we here at the Nicholls Worth have decided to put a change to that!
Here is a complete recipe guide to rock your Thanksgiving food spread!
Ham: Evan Cressoine
Thanksgiving Day is the national holiday mostly associated and known for its food. This is the day for families to gather together to enjoy a nicely prepared meal, to express what they are thankful for, and to celebrate.
Many classic recipes come from Thanksgiving Day feasts. One most known is the Holiday Baked Ham.
This ham is not like any other everyday ham. It is specially made for the Thanksgiving feast. My mom has on more than one occasion made this ham.
Ingredients:
1 cup of orange juice
1 cup of maple syrup
1 cup of ginger ale
1/2 cup of brown sugar
1/2 cup of honey
1 jar of maraschino cherries
1 bone-in-ham
1 can of juicy pineapple slices.
1 toothpick
Instructions:
The first step is to preheat the oven to 350 degrees. Next, in a medium sized bowl, you mix together maple syrup, orange juice, ginger ale, brown sugar and honey.
Stirring in the maraschino cherry juice and half the actual cherries, you then must cut the outside of the ham with a sharp knife in a diamond pattern. These cuts should be about one fourth of an inch deep. This way, the ham can soak up the juice, giving it that special flavor.
The third step would be to place the ham into a pan and pour the juice on top of it. While it may look like there is far too much juice, it is actually the exact amount. The ham will soak it all while baking.
Once you decorate the ham with pineapples and maraschino cherries, it becomes ready to put in the oven. The ham must bake for two hours. The internal temperature should be around 160 degrees when it is finished baking.
Once the ham comes out of the oven, it can be placed into a serving plate and carved after letting it sit for ten minutes.
Spaghetti and Cheese Casserole: Noah Domangue
This particular dish is a staple in my family, as my 85-year old great grandmother has been cooking this small slice of heaven for longer than I have been alive! It is truly a delicious side dish that is versatile enough to fit in with any type of dish this holiday season.
Ingredients:
One 1 lb. package of regular spaghetti
1 lb. of sliced American Cheese (“I prefer the package, not individually sliced,” Maw Maw Betty)
One stick of salted butter (not margarine)
One 4 oz. can of Pet Evaporated Milk
8 x 8 baking pan (“Disposable foil works great,” Maw Maw Betty)
Instructions:
Bring water to boil with teaspoon of salt (or as per package instructions on spaghetti) in 4 qt. saucepan. Boil according to directions on the package.
When cooked, drain water using a colander or strainer. Layer one half of cooked spaghetti in the bottom of the baking pan, and cover with a layer of cheese slices touching each other-no gaps; lay one pat of butter on top of each slice of cheese. Spread the remaining spaghetti on top, and repeat second and third steps; shake the can of evaporated milk prior to opening. Once open, pour the milk over the spaghetti/cheese/butter layers.
Cover it all with foil, and bake in the oven for 30 to 40 minutes at 350 degrees F. Uncover the foil once removing the pan from the oven, and if it is bubbling with melted, creamy cheese and butter, then bake for five additional minutes without the foil cover to give it a light brown texture.
Broccoli Casserole: Miranda Danos
Are you looking for a Thanksgiving recipe that isn’t turkey or ham? Check out this recipe that is vegetarian-friendly and great for everyone to enjoy!
Ingredients:
½ stick butter
1 large onion
1 quart of half and half
1 pint of heavy whipping cream
1 can of cream of chicken soup
2 heads of broccoli
1 large jar of cheese whiz
4 cups of cooked rice
½ pack of Bear Creek broccoli soup mix
Finally, chop onion and cook in melted butter until tender. Add all ingredients EXCEPT rice, and cook until heated and broccoli is tender. DO NOT BOIL. Add rice and pour into a buttered 9×13 pan. Bake at 350 degrees Fahrenheit for 15-20 minutes.
Bread Rolls: Brogan Burns
Turkey and ham are the staple dishes of Thanksgiving, but what makes the meal are the sides. Baked macaroni, potatoes, cranberry sauce and rolls are all good, but there can only be one top side. That top side is the bread rolls.
Nothing gets my mouth watering more than a good bread roll. Whether it be homemade or store-bought Hawaiian rolls, they all do the job. There may not be many variations in bread rolls, coming in only buttery or sweet, but it makes up for that with the warm pillow-like texture.
I will give you a recipe from SimplyDeliciousFood.com to make sure that you make the bread rolls of your dreams
Ingredients:
1 cup warm milk
10 g (2tsp) instant yeast
1 tsp sugar
3-4 cups flour (any white flour can be used: Cake, all-purpose,it or bread)
1½ tsp salt
1 large egg
1/4 cup butter softened
And for the egg wash
1 egg
2 tbsp water
2 tbsp melted butter for finishing
Instructions:
- Whisk milk, sugar and yeast together. Allow to stand for 10 minutes until foamy.
- In the bowl of a stand mixer fitted with the dough hook attachment, combine the flour and salt.
- With the mixer running, add the milk mixture and allow to knead in. Add the egg and allow to beat in.
- Add the butter, allow to knead in. At this point, the dough will be quite sticky, add the remaining cup of flour one tablespoon at a time, until the dough is soft, smooth, and just slightly sticky.
- Cover with plastic or a damp dish towel, and allow it to rise for 1 hour. While the dough is rising, prepare two sheet pans by lining them with parchment or baking paper.
- Transfer the dough to a floured surface and divide it into 8 equal pieces. Roll each piece of dough into a ball then place it on the prepared sheet pans. Take care not to place them too close together as they will continue rising.
- Cover again and allow to rise for 30 minutes while you preheat the oven to 180°C/350°F. Whisk the egg and water together for the egg wash.
- Brush the dough balls with egg wash then place in the oven and allow to bake for 15-20 minutes until golden brown and risen. Once baked the bread rolls will sound hollow when tapped on the bottom.
- Remove, brush with a little butter and allow to cool for 10 minutes before serving
Custard Pie: Owen Callais
Every Thanksgiving, my aunts and grandmother make a custard pie as a dessert. Everyone at lunch and dinner takes a piece because it is so good. To keep it interesting, we never do the same recipe twice, and look online every year for a different recipe. They are all super simple recipes with easily accessible ingredients. Websites, such as Betty Crocker and King Arthur Baking have great pie recipes. This particular recipe is similar to Recipe Girl’s custard pie recipe, and it is the same one we used last year. This recipe can be completed within two hours or less and serves eight people. Here is an easy recipe for the custard pie for everyone to enjoy.
Ingredients:
1 unbaked pie crust
4 large eggs
2 1/2 cups of whole milk
1/2 cup of granulated white sugar
3/4 teaspoon of ground nutmeg
1/4 teaspoon ground cinnamon
1/2 teaspoon of salt
Instructions:
- First, unroll the pie crust into a 9-inch pie plate and crimp the edges. Refrigerate the pie crust for 30 minutes.
- Preheat the oven to 400 degrees F. Line the pie crust with aluminum foil and fill with pie weights, such as uncooked rice. Bake until the edges of the bottom of the crisp is a golden-brown shade. This will probably take 10-15 minutes. After that, remove the foil and weights, and bake until the bottom is that same shade of golden-brown, another 3-6 minutes. Remove from the oven and set it to cool down.
- In a large bowl, whisk the eggs first. Then, whisk the milk, nutmeg, sugar, cinnamon, vanilla, and salt. Whisk until the ingredients are well blended and pour into the pre-baked crust. Cover the edges with aluminum foil. Bake for 25-30 minutes. Then, cool at room temperature. Refrigerate until it is ready to be served.
It really is that simple. Custard pie is almost guaranteed to be a staple dessert during Thanksgiving. They are really good and easy to make, especially on a college budget. You may have leftover pies after lunch or dinner, so just be sure to refrigerate as soon as possible or the pie may grow bacteria and go bad! Other than that one precaution, this should be a real treat for friends and family to enjoy.
Apple Pie: Raegan Chiasson
Undoubtingly, food is often associated with Thanksgiving more than anything. On Thanksgiving, many families enjoy various foods that they do not typically eat throughout the year. Food served at Thanksgiving may vary across families, however, most foods such as turkey, rice dressing, macaroni and cheese and green bean casserole are seen at many Thanksgiving tables. However, my favorite Thanksgiving food comes after all of those.
As important as the main foods are during Thanksgiving, desserts are just as important in my family. As well as having many main dish options, we have many dessert options. One always being APPLE PIE!
Apple pie, for me, always satisfies that “I need something sweet now” feeling after every meal. With the amount of savory food eaten on Thanksgiving, I definitely crave something sweet at some point during the day. A warm piece of apple pie, with a cold scope of vanilla ice cream on top, without a doubt, quenches that craving.
Being that there is no excuse for my family to bake/order an entire apple pie during a normal day, I do not get to enjoy it as much throughout the year as I’d like. Therefore, having it at Thanksgiving, to me, makes it taste so much better. It is definitely something that I look forward to having this year, as well every other year at Thanksgiving.
Ingredients:
3 tablespoons granulated sugar
8-10 medium apples (thinly sliced)
Just a bit of butter and cinnamon
Double pie crust
Optional: granulated or chubby sparking sugar for the top
Instructions:
- Mix first 5 ingredients together in a medium bowl.
- Roll out and place an uncooked pie crust in the bottom of a deep 9-inch pie plate.
- Place the apple mixture in the uncooked pie shell. Place small pieces of butter on top of the apple mixture.
- Top with second pie crust, crimp the edges, and then cut a few slits in the top crust to allow steam to vent.
- Mix the egg white and 1 tablespoon of water together in a small bowl and then brush the top with water and sprinkle with sugar before baking.
- Bake at 450 for the first 15 minutes, then reduce the heat to 350 and continue cooking for an additional 30 to 40 minutes.
- Cool for 10 minutes before serving.
German Gluhwein: Alexia Castellon
Traditionally served in Germany, this warm, flavorful wine will keep you warm as you sip on it for the holidays. Gluhwein literally translates to “glow-wine,” and that’s how it makes you feel as you sip on it in the cold breeze outside.
While preparing, it will make your house smell like pure bliss with a mixture of heart-warming holiday scents. The most important thing is to not let it boil, or it will boil all of the alcohol away; warm it up in low heat for over 30 minutes.
This is a pretty simple recipe, but feel free to spice it up with some cinnamon sticks and orange peels.
Ingredients:
1/2 medium orange
3/4 cup water
1/4 cup turbinado or granulated sugar
20 whole cloves
2 cinnamon sticks
2 whole star anise
1 (750-milliliter) bottle dry red wine
Rum or amaretto, for serving
Instructions
Using a vegetable peeler, remove the zest from the orange in wide strips, taking care to avoid the white pith; set aside. Juice the orange and set the juice aside.
Combine the water and sugar in a large, non-reactive saucepan, and boil until the sugar has completely dissolved. Reduce the heat and add the cloves, cinnamon, star anise, orange zest and orange juice. Simmer until a fragrant syrup forms (about 1 minute).
Reduce the heat further and add the wine. Let it barely simmer for at least 20 minutes but up to a few hours. Keep an eye out so that it doesn’t reach a full simmer.
Strain and serve in small mugs, adding a shot of rum or amaretto and garnishing with the orange peel and star anise if desired.
Turkey: Brennan Arcement
Perhaps the most important ingredient of a Thanksgiving feast– the meat of the matter, if you will– would be the turkey. Though there are hundreds of ways to prepare this particular part of the meal, here is a recipe that is tried and true for even the simplest of cooks:
INGREDIENTS
1 whole turkey, any size, thawed if frozen
2 cups low-sodium chicken broth, vegetable broth, water, or other liquid
2 sticks (1 cup) melted unsalted butter or oil, for basting (optional)
EQUIPMENT
Roasting pan (or an alternative roasting dish)
Roasting rack (or something to lift the turkey off the pan)
Turkey baster, brush, or ladle (optional, if basting)
INSTRUCTIONS
Prepare the turkey for roasting. Thirty minutes to an hour before roasting, take the turkey out of the refrigerator. Remove any packaging and the bag of giblets (check in the body cavity and in the neck cavity). Set the turkey breast-side up on the roasting rack set in a roasting pan and let it sit while the oven preheats. This takes the chill off the meat, which helps the meat cook faster and more evenly. It also gives the skin time to dry out, which promotes browning and crisping. (Note: Your turkey will likely still feel cool to the touch after sitting at room temperature — that’s fine and you can continue on with roasting.)
Preheat the oven to 450°F. Position an oven rack in the bottom third of your oven, remove any racks above it, and heat the oven to 450°F. If you brined your turkey, as we did, no need to do anything now. If your turkey is straight out of the package, rub it with some salt and pepper before putting it in the oven. We recommend leaving your turkey un-stuffed and un-trussed, both because it’s easier and because the turkey will cook more evenly.
Add liquid to the roasting pan. When ready to roast, pour the broth or water into the roasting pan.
Place the turkey in the oven and turn down the heat. Place the turkey in the oven and turn down the heat to 350°F. We recommend roasting turkeys breast-side up. Some people like starting the turkey breast-side down to shield the breast meat, but the idea of flipping a hot, sputtering turkey is not our idea of a good time. Instead, we prefer to simply shield the breast meat with aluminum foil toward the end of cooking if it starts getting too browned.
Roast the turkey. The rule of thumb for cooking a turkey is 13 minutes per pound. So our 16-pound turkey was estimated to cook in about 3 1/2 hours. However, some factors like brining the bird, cooking with an empty (un-stuffed) cavity, and leaving the legs un-trussed will contribute to much faster cooking. Plan on the 13-minute-per-pound rule, but start checking the temperature of your turkey about halfway through the scheduled cooking time to gauge how fast it’s cooking.
Baste the turkey every 45 minutes. Every 45 minutes, remove the turkey from the oven, close the oven door (don’t let that heat out!), and baste the turkey all over. To baste, tilt the pan if needed and use a turkey baster or spoon to scoop up the pan liquids and drizzle them on top of the turkey. Basting with pan juices cools the surface of the turkey and slows down cooking, which in turn keeps the breast meat cooking at close to the same rate as the legs and thighs. In the last 45 minutes or so of cooking, you can also baste the turkey with melted butter or oil. This helps crisp up the skin and turn it a beautiful deep golden brown.
Check the turkey’s temperature. Begin checking the turkey’s temperature about halfway through the estimated cooking time. Check the temperature in three places: the breast, outer thigh, and inside thigh (see photos above). In every case, the meat should be at least 165°F when the turkey has finished cooking. If any place is under that temperature, put the turkey back in the oven for another 20 minutes. Shield the breast meat with foil if needed to keep it from overcooking.
Rest the turkey before carving. Remove the turkey from the oven. Grab one side of the roasting rack with an oven mitt and tilt the whole pan so the liquids inside the turkey cavity run out into the pan. (These juices are used to make the gravy.) Then, lift the whole turkey (still on the rack) and transfer it to a clean cutting board. Tent the turkey loosely with aluminum foil and let it rest for at least 30 minutes. This gives time for the meat to firm up and the juices to be re-absorbed into the muscle tissue, making the turkey easier to slice and taste juicier.
Carve the turkey. Carve the turkey the same way you would carve a chicken; see the video above for a walk-through of the process. Remove the wings first, then the thighs, then the breast meat. Once you have the meat off, you can separate the thighs into thighs and drumsticks and carve the breast meat into individual slices.
Don’t forget about the leftovers. One final note! Once you’ve sat down at the table, don’t forget about the turkey back on the counter. The leftover meat needs to be refrigerated within two hours of cooking, after which the risk of something nasty taking up residence starts to increase exponentially. Be safe!
RECIPE NOTES
Ways to Add Flavor to Your Turkey: Rub your turkey with butter or oil for a richer flavor and browner skin, rub minced herbs or ground spices into (or beneath) the skin for more flavor, place a few halved lemons or garlic cloves inside the cavity of the turkey.
Storage: Leftovers can be refrigerated in an airtight container for up to 4 days or frozen for up to 2 months.
Nutritional information is based on a 15-pound turkey basted with 1 cup of butter.
Now that you know how to make a Thanksgiving meal like a pro, go feast like never before!
From all of us here at the Nicholls Worth, have a wonderful Thanksgiving!